Do DTF oven issues keep you up all night, stop your production, and produce less-than-perfect prints? It’s not just you. Even the most experienced DTF printing professionals sometimes struggle with temperature changes, adhesion issues, and other issues.
But don’t worry! This article will reveal how to diagnose and overcome these oven issues, ensuring your DTF printing journey is successful. Say goodbye to oven-induced headaches and hello to flawless prints. Let’s start now!

DTF Oven Problems Explained
Problem 1: Printing Sheet Oven Inconsistencies
The frustrating issue of variable heating in the printing sheet oven is one of the difficulties I’ve encountered in my experience as a veteran DTF printing specialist. Imagine that your design has been painstakingly created, the film is properly aligned, and you have great hopes.
But, alas! You see uneven heating when the printing sheet passes through the oven, which results in your prints having inconsistent colors or, worse, unattractive blotches. Although this problem might be frustrating, don’t worry; we’ll look at options to get your DTF oven back on track.
Solutions
- Temperature Calibration: Begin by calibrating the oven’s temperature settings. To gauge the real temperature at different locations within the oven, use a trustworthy thermometer. To ensure equal heating, adjust the temperature settings appropriately.
- Check Airflow: Inconsistent heating might result from poor airflow. Verify that the oven’s ventilation system is in good working order and that there are no blockages that could prevent airflow.
- Element Maintenance: Regularly inspect and maintain the heating elements. Clean off any buildup or dust that could be causing hot spots or uneven heating. Replace any worn-out or broken components right away.
- Placement of Prints: Pay close attention to where your prints are placed within the oven. Make sure they are appropriately placed apart from the heating components and are not too near, since this might result in overexposure.
- Testing and adjusting: Use sample prints in test runs to pinpoint particular inconsistencies. To obtain more even heating, adjust the location of prints or temperature settings as necessary.
Problem 2: Element Power Discrepancy
The bane of any DTF printing enthusiast is element power difference. Even if your printing sheet is ready, when you examine your oven’s components, you find that they aren’t all singing in unison.
It seems that certain components are working harder than others, which causes uneven heating and erratic outcomes. It’s rather confusing, isn’t it? But do not worry, as we are going to solve the puzzle of this problem and get those components right for faultless and consistent prints.
Solutions
- Element Inspection: Inspect the oven’s heating components in great detail. Look for any physical deterioration or indications of use. Replace any defective components right away if you find any.
- Balancing Power: Adjust the power distribution to ensure that all elements receive an equal share. To balance the power distribution, refer to the oven’s handbook or ask a technician for help.
- Regular Maintenance: Implement a routine maintenance schedule for your DTF oven. Regularly inspect the heating elements for any loose connections or wiring issues that could affect power distribution, and clear them as necessary.
- Temperature Control: Buy an oven with advanced temperature control features like zone control or digital temperature monitoring. These systems can help maintain elemental power consistency.
- Help from a Professional: If your attempts fail to resolve element power disparities, think about contacting a qualified technician with expertise working with DTF ovens. They are able to identify and fix complicated electrical problems.
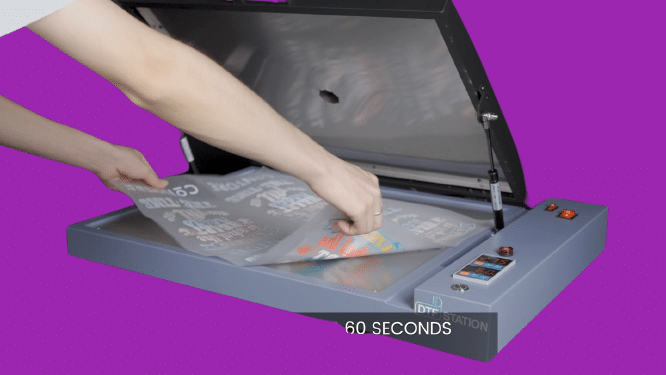
Problem 3: DTF Film Adhesion Problems
More often than I’d care to admit, I’ve had to deal with this annoying problem. Your design has been carefully produced, your printer settings have been checked, and you’ve been excitedly for the printing process to start. But soon as you begin to feel secure, you realize that the DTF film isn’t adhering properly. It’s peeling off, leaving you with prints that resemble a jigsaw puzzle waiting to fall apart.
Solutions
Make sure the printing surface is clean and free of any impurities, such as dust or oils. Before applying the DTF film, wipe the surface with an appropriate cleaning solution and a lint-free cloth.
Use DTF PET film of the highest quality that is made for your particular printer and ink. Adhesion issues can arise from using cheaper or unsuitable films. Apart from these two, we have some additional workarounds, just in case:
- Application Technique: Pay close attention to how the DTF film is applied. Apply it evenly and smoothly to avoid air bubbles or wrinkles that might hinder adherence.
- Pressure Adjustment: Adjust the pressure settings on your DTF printer to ensure proper contact between the film and the substrate. Both excessive and insufficient pressure can result in adhesion issues.
- Drying Time: After printing, give the film enough time to cure completely before trying to remove it. Observe the drying and curing temperature instructions provided by the manufacturer.
- Film Storage: Keep your DTF film in a controlled environment to prevent the absorption of moisture, which can affect adhesion. Utilize vacuum-sealed or airtight containers or bags.
- Controlling humidity is important because too much humidity can make it difficult for films to adhere. Utilize dehumidifiers if required.
Problem 4: Inadequate Ventilation
Inadequate ventilation – an issue that can turn your DTF printing haven into a stifling and frustrating workspace. I have experienced the oppressive sensation of insufficient airflow during a vital print run.
I can speak from experience about the value of good ventilation in preserving a safe and productive workplace since I am a specialist in DTF printing. The worst of all the symptoms of poor ventilation are deteriorated print quality, discomfort, and residual odors.
Solutions
- Ventilation System Upgrade: Consider upgrading your workspace with a more robust ventilation system, such as exhaust fans or air purification units. Make sure they are installed and maintained appropriately.
- Proper Ventilation Design: Consider your workspace’s layout and make sure the ventilation system eliminates fumes and airborne particles from the DTF printing area. You can employ a DTF fume extractor to achieve this.
- Establish a ventilation schedule that includes pre-printing, during-printing, and post-printing ventilation in order to reduce fumes and maintain a constant airflow.
- Air filters: To effectively catch and remove particles and pollutants from your ventilation system, use high-quality air filters. Filters should be changed often to maintain peak performance.
- Organize your workstation such that improved ventilation is possible. Avoid placing items like debris or equipment in the way of vents or ventilation routes.
- Personal Protective Equipment (PPE): To reduce exposure to fumes when printing, arm yourself and your team with the proper PPE, such as respirators or masks.
- Regular Maintenance: Keep your ventilation system in tip-top shape by doing regular maintenance. Replace filters, clean the ducts, and look for blockages.
Checklist for DTF oven maintenance
A DTF (Direct-to-Film) oven’s upkeep is essential for obtaining consistent, high-quality prints. Here is a maintenance check list for DTF ovens:
Daily Maintenance:
- Visual Inspection: Examine the oven visually each day to look for any obvious damage, frayed cables, or missing heating components.
- Internally, clean the oven to get rid of any dust, dirt, or leftover film. To clean, use compressed air or a lint-free cloth.
- Examine the conveyor belt for any evidence of wear, alignment issues, or other damage. Make sure it moves without jerking and smoothly.
- Monitor Temperature: Examine the oven’s temperature and compare it to a trustworthy thermometer to ensure that it is keeping the proper level. If required, change the temperature settings.
Weekly Maintenance:
- Examine the heating elements carefully for any indications of deterioration, corrosion, or uneven heating. Any broken parts should be replaced right away.
- Ventilation System: To ensure appropriate airflow and effectively remove fumes, clean or replace the ventilation system’s air filters as required.
- Conveyor Belt Alignment: If the conveyor belt became out of alignment while in use, check and correct it.
Monthly Maintenance:
- Lubricate Moving Parts: Follow the manufacturer’s instructions for lubricating the conveyor system’s moving parts and any other mechanical parts.
- Calibration: To guarantee accuracy, calibrate the temperature controls. Use a trustworthy thermometer to check that the temperature readings reflect the real temperature.
- Examine Electrical Connections: Look for evidence of corrosion, wear, or loose electrical connections in all electrical connections, wires, and terminals. Replace any broken wires and tighten any loose connections.
- Clean the Exterior: Clean the exterior of the oven, including control panels and buttons. To get rid of any dirt or leftovers, use a gentle cleanser.
Quarterly Maintenance:
- Safety Check: Conduct a safety check to make sure that all security elements, such as alarms or emergency stop buttons, are operational.
- Review the Manual: Review the maintenance recommendations provided by the manufacturer for your model of DTF oven, and abide by them.
Annual Maintenance
- Professional Inspection: To solve any difficult concerns and ensure the long-term dependability of your DTF oven, consider arranging an annual inspection and maintenance service done by a skilled expert.
- Replace Consumables: Replace any consumable parts or components, such as heating elements or conveyor belts, that are no longer functional.
- Verify the accuracy of the oven’s temperature control system by performing a calibration check. Recalibrating might be required.
Following this checklist and maintaining a regular maintenance plan will help you reduce downtime, increase printing productivity, and prolong the life of your DTF oven, all of which will lead to consistently good prints.
Conclusion
In conclusion, fixing DTF oven difficulties is crucial for preserving the effectiveness and quality of your printing procedure. Proactive troubleshooting and routine maintenance are your friends when it comes to dealing with difficulties including uneven heating, power variations, film adhesion issues, and insufficient ventilation.
You’ll overcome these issues and ensure a smooth DTF printing trip by following the solutions and maintenance checklist. With meticulous care, you’ll generate flawless prints and keep your DTF printing environment working smoothly.
FAQs
Yes, uneven heating can result in print quality issues such as color variations or blotches on your prints. It’s crucial to address this problem to maintain consistent results.
Signs of inadequate ventilation include lingering fumes, discomfort, and compromised print quality due to poor airflow. Proper ventilation is vital for a healthy and efficient workspace.
Daily visual inspections are advisable, with weekly cleaning and checks for heating elements and the conveyor belt. Monthly maintenance includes lubrication and calibration. Annual professional inspections are also recommended.
Balancing power distribution among heating elements may require technical expertise. It’s best to consult your oven’s manual or seek assistance from a qualified technician for this task.
It’s essential to use high-quality DTF film compatible with your printer and ink. Incompatible or subpar films can lead to adhesion problems, affecting print quality.
Proper surface preparation, correct application techniques, and adequate drying time are key to ensuring consistent DTF film adhesion to your substrate.
Yes, it’s essential to wear appropriate personal protective equipment (PPE) like respirators or masks if needed. Maintain a well-ventilated workspace to minimize exposure to fumes.
Yes, regular temperature calibration is essential to ensure accurate heating. Verify temperature settings with a thermometer and adjust as needed to maintain consistent results.
Regular maintenance, adherence to the maintenance checklist, and professional inspections can help prolong your DTF oven’s lifespan and reduce the likelihood of breakdowns.
Replacing heating elements and certain components may require professional expertise. It’s advisable to consult a technician to ensure proper installation and functionality.

Ashley Wang is a skilled sales manager with knowledge in DTF printing. She presently works for ShenLan Digital, a reputable DTF printer maker. Ashley is the best person to offer advice on selecting the most suitable DTF printer because she has tested a lot of them. She launched DTFPrinterSchool to educate individuals and organizations about DTF printing technology, providing her expertise and observations on the most recent advancements in the sector. Ashley is an invaluable resource for businesses and individuals wishing to invest in DTF printing technology because of her expertise and experience in the industry.